
|
|


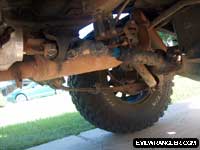
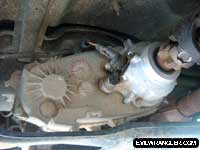
Here's some tips that I found while completing this install. Some of these apply to all jobs. Forgive me. o You may want to get an air powered impact wrench and a good set of pullers. You will need to pull off the front drive shaft nut and yoke. Yes you will need to pull the front drive shaft where it connects to the T-case. I had to replace the yoke on my rear differential also. (Damage from the blown U-joint) I couldn't have gotten that nut off without the impact wrench. Trust me I tried. (even with a week of PB Blastering) You can borrow or rent a puller from most auto parts stores, instead of buying one. o If you need to change out the U-joints buy the U-joint 3in1 service kit from Harbor Freight or have a Vise and large sockets available. I paid 29.99 for the kit from Harbor Freight. Ut looks like an extra large C-clamp with a hole in the non-threaded end. o Put the T-case in 4Low before you start. It allows the T-case shafts to extend out of the case the farthest. o The Snap ring pliers are necessary (Must have flat tip) The round ones won't work worth a flip. The bigger the better. Mine cost 15.99 at O'reilly's and I wish they were just a little bigger. Notice that this is what everyone remembers, that's because it's important. o Definitely need the 10mm 12 point socket. A 6 point will not work. o I took my transfer case out of the Jeep. I'm glad I did because it rained halfway through and I didn't have to get wet until I put everything back. However, I believe it could have been done easily without removing it. Personal preference. It's 6 more bolts. You'll have to use a closed end wrench on some of them to remove and replace. There is no fluids between the T-case and the Transmission. o I had to go to the machine shop halfway through to have the needle bearings pushed off. You either need a hydraulic press, some sort of Jimmy rig Vise or a local machine shop needs to be open. This is not one of those areas where you want to tap it off with a screwdriver and a mallet. TJ's newer than 1997 won't have needle bearings. o Use ziplock bags for your pieces as you take them off or if you have a clean area on your bench line them up in order. I also labeled my bags with a marker. Be organized. o Have plenty of rags available. You will need them to clean yourself, your tools or your parts. Old t-shirts work better for me than those red shop rags. o Be careful with the casing when splitting the T-case in half. The aluminum it's made of is soft. There are places on each side of the crack of the t-case to insert a chisel or large flat screwdriver and turn. Don't try to chisel your way in. o If something doesn't seem to fit STOP! Don't force anything. Everything goes together easily. If that bolt seems to hard to turn or something doesn't fit, don't force it, you're doing something wrong. Recheck the instructions or rethink your strategy. o Speedo Gear. If your Speedo Gear doesn't work afterward, your installation of the speedo was incorrect. If you pull the speedo gear and inspect it, you will notice that it leans more to one side that the others. This is the side that needs to touch the gear of the main shaft. If worse comes to worse there is only 4 positions it can be in with the C-type hold down. Try them and test drive until you find the one that works. o On some models a hacksaw or cut off wheel is necessary to cut off excess of the shifter rod. Ewww. Glad this didn't apply to me. I used the instructions that came with the kit. I'd say they were fairly complete as compared to my lift kit. Additional Web links. Although they are different kits they came in handy for the disassembly and information. Info you will need to order a custom drive shaft from Tom Woods. SYE Installation found on Tom Wood's site. These are different from the instructions that I received with the kit. I thought the shipped instructions were more complete. SYE Installation by James Towle found on Stu Olsen's site. Good color pics. Installing JB's SYE kit and Tom Wood's driveshaft found on Jeepin.com. JB Conversions Slip Yoke Eliminator found on Rockcrawler.com I hope this helps somebody in the future or gives them the courage to tackle this project like I did. Thanks to everyone on else on the Internet for posting write-ups and answering questions on message boards for helping find this info. |
 |
Copyright © 2000/2001 All rights reserved..
